Blog

  • Taurus GX4 Problems [& How To Fix Them!]

    Taurus GX4 Problems [& How To Fix Them!]

    Taurus GX4 is a compact, lightweight, and durable EDC pistol. Due to its price-to-performance, this gun is an easy choice for self-defense or backup weapons.

    While Taurus managed to put good food on your plate, they couldn’t season it without overdoing it. What I mean is, that there are some issues lying within the weapon. Some are fixable, some require you to claim help from Taurus or head to a local gunsmith.

    If you are planning to purchase the GX4 or is a current owner, you will find the information useful. After all, knowing how to tackle common problems will always come in handy.

    Taurus GX4 Problems: Common Issues and Effective Solutions

    The Taurus GX4 is a popular compact pistol known for its reliable performance, accuracy, and compact design. However, like any other firearm, the GX4 may encounter certain problems that can impact its functionality and user experience. Let’s discuss some of the common problems that GX4 owners may encounter and provide effective solutions to address them.

    1. Failure to Feed

    One of the most reported issues with the Taurus GX4 is a failure to feed properly. This occurs when the pistol fails to pick up and chamber a new round from the magazine. There are a few potential causes for this problem, including:

    • Weak magazine springs: Ensure your magazine springs are strong and replace them if necessary.
    • Improper magazine loading: Properly load your magazines, ensuring each round is aligning correctly.
    • Dirty or damaged magazines: Clean your magazines regularly and inspect them for any damage. If a magazine of yours is damaged, don’t try to repair it. Change it all together for better results.
    • Improper grip or limp-wristing: Practice a firm grip and proper shooting technique to minimize any potential limp-wristing issues.

    2. Failure to Eject

    Another problem occasionally experienced with the GX4 is a failure to eject spent casings. This occurs when the pistol fails to push the casing out of the chamber and instead leaves it partially or completely lodged in the firearm. The following factors may contribute to this issue:

    • Weak extractor tension: Ensure your extractor tension is adequate, and if necessary, consult a gunsmith to adjust or replace the extractor.
    • Dirty or fouled chamber: Clean the chamber regularly and inspect it for any fouling or debris. Use a cleaning brush and solvent to remove any buildup.
    • Defective or worn-out extractor: If you suspect a defective extractor, contact Taurus Customer Service for assistance or consult a qualified gunsmith.

    3. Light Strikes

    Light strikes occur when the firing pin strikes the primer with insufficient force, resulting in a failure to ignite the round. This issue can be frustrating and potentially dangerous. Several factors might contribute to light strikes:

    • Weak or worn-out striker spring: Check the striker spring and replace it if necessary. Ensure you are using a reliable and high-quality replacement spring.
    • Improper ammunition seating: Properly seat your ammunition in the magazine to prevent any feeding issues that can lead to light strikes.
    • Dirty or damaged firing pin channel: Clean the firing pin channel regularly to remove any dirt or debris that may hinder the proper strike of the firing pin.

    If none of the above solutions work, contact Taurus Customer Service or consult with a professional gunsmith.

    4. Stiff or Sticky Slide

    Some GX4 owners have reported that the slide may feel stiff or sticky, making it challenging to rack or manipulate the pistol smoothly. This can impact the speed and ease of firearm operation. The following factors may contribute to this problem:

    • Dirt or debris in slide rails: Clean the slide rails thoroughly, removing any dirt or debris that may be causing the stiffness. Use a cleaning solvent and a soft brush for best results.
    • Faulty or inadequate lubrication: Apply an appropriate lubricant to the slide rails as recommended by the manufacturer. Ensure you use the right amount, as excessive lubrication may cause other issues.
    • Inadequate break-in period: Allow for an adequate break-in period, as some firearms may require a few hundred rounds to fully smooth out and function optimally.

    5. Magazine Release Issues

    Sometimes, Taurus GX4 owners may experience problems related to the magazine release. These problems can include difficulty in releasing the magazine or accidental magazine ejections. The following factors may contribute to this issue:

    • Stiff or improperly adjusted magazine release button: Check the magazine release button for any stiffness or signs of improper adjustment. Consult the owner’s manual or a professional gunsmith for guidance on adjusting the button correctly.
    • Accidental contact with the magazine release button: Be cautious of accidental contact with the magazine release button, especially during shooting sessions. Familiarize yourself with the grip and shooting position that minimizes unintentional magazine releases.

    Frequently Asked Questions

    What are the common issues with the Taurus GX4?

    Some of the common issues include feeding problem, loading issue, misfire, and sticky slides.

    Does Taurus G4X have any sighting problem?

    No, it doesn’t. The rail of this accepts a wide vareity of optic and helps you shoot at different range with ease. Stock sight is not half bad either if you are into that.

    What should I do if I face problems in my G4X?

    If your Taurus having a lot of issues, then it’s better to talk with Taurus. They will take care of your weapon. But some of the problems can be fixed through DIY process or taking it to a gunsmith.

    Can I perform DIY fixes for Taurus GX4 problems?

    While some minor maintenance tasks can be done at home, it is recommended to have a professional gunsmith handle major issues with your Taurus GX4. They have the knowledge, experience, and appropriate tools to ensure proper diagnosis and repair, minimizing the risk of causing further damage.

    Final Thoughts

    In conclusion, the Taurus GX4 do have a few problems that need to be addressed. One of the main issues reported by users is the malfunctioning safety mechanism, which can cause accidental discharges. Additionally, some owners have encountered difficulties with the magazine release, experiencing jams or the button becoming sticky.

    While these problems may not be widespread, they are significant enough to be a cause for concern for potential buyers. Remember, if you have any persistent problems or concerns with your GX4, it is always recommended to consult Taurus Customer Service or seek assistance from a qualified gunsmith. Stay safe and happy shooting!

  • Holosun 510C VS Eotech XPS2 [Which One Is Better?]

    The Holosun and EOTech are the popular manufacturers of red dot sights. So, it’s very normal to get confused while choosing a sight from these brands. Especially, when the sights like Holosun 510c and EOTECH XPS2 have the same sort of quality and functionality, the decision gets more difficult.

    Hence, we have brought you a comparative discussion on these sights so that you can make a better decision while choosing a sight for your firearm. But we would suggest when you’re going through their comparisons, keep your shooting needs in consideration. This way it will be easier to find out which sight will be perfect for you. So, let’s start!

    Holosun 510C

    Key Features

    • Lightweight and compact.
    • Adjustable brightness.
    • Quick release mounting system.
    • Night vision device compatible.

    When it comes to red dot sights, Holosun is currently one of the leading brands. Their HS510C would be a top priority for anyone looking for a red dot for their rifles. While it’s not the most expensive option in the world, it does wonder in the price bracket it’s competing.

    The optic is made out of high-quality aluminum. It’s the same type of aluminum you see in high-end scopes. The entire housing is shockproof, fogproof, and waterproof. You can submerge the optic if you wish to. While I don’t necessarily recommend you do that, I certainly do recommend using it in cold weather.

    An illuminated reticle and adjustable brightness make it an appealing choice for night vision endeavors as well. While it’s not the ideal choice for hunting short to medium range, you can definitely use this on a bolt-action for plinking.

    Eotech XPS2

    Key Features

    • Extremely durable.
    • Will work with a broken lens.
    • Lightweight and compact.
    • Suitable for entire day usage.
    • Extremely bright with maximum intensity.

    When looking for an ideal compact holographic sight, Eotech will come on top. Their optics are used by civilians and law enforcement services. Their sights are quite expensive and the price tag makes sense. The care Eotech puts through behind one of these optics makes a lot of difference. Thanks to that, no clone has come close to the original.

    The holographic crosshair on this optic is illuminated. You will find plenty of brightness settings to increase or decrease the intensity depending on your environmental lights.

    The housing is made out of aluminum. It is also submersible if you wish to do such. The optic also comes with a mounting system that you can easily remove if you want to take off the optic and install something else. Overall, it’s one of the best budget choices if you are looking for a holographic sight for your firearm.

    Specs

    SpecsHolosun 510CEOTECH XPS2
    Reticle2 MOA Dot and 65 MOA Circle2 MOA Dot and 65 MOA Circle
    Housing MaterialAluminum and TitaniumAluminum
    Power SourceSolar and BatteryBattery
    BatteryCR2032CR123
    Battery Life (hours)5000050000
    Brightness Setting10 DL&2 NV20 daylight settings
    Side Button ControlYesNo
    Adjustment per Clicks0.5 MOA0.5 MOA
    Night Vision CompatibilityYesNo
    Submersion3ft. (1m)10ft. (3m)
    Weight4.94 oz.9.0 oz.
    MountPicatinny1” Weaver or MIL-STD 1913
    Warranty5 years10 years

    Holosun 510C/ EOTECH XPS2 – Differences

    Even though both of the sights are good in quality, they have technical differences that can impact your shooting experience. So, we will be discussing the sights in the following terms:

    • The sights are constructed with different materials, hence, we will be looking at how they can influence the durability and performance of the sights.
    • Since the MOA circle of the sights is not the same, it may impact your target acquisition.
    • Both of them have different battery types with different battery life hours which work as one of the deciding factors for an economic purchase.
    • The brightness adjustment of the optics is not similar, so, the target visibility gets affected due to this difference.
    • The products are offered with various sorts of accessories.
    • Lastly, the sights have two different types of warranty policy.

    Discussion On The Sights

    While the Holosun 510c is an open reflex sight, the EOTech XPS2 is a Holographic sight. And they both work great when it comes to close target acquisition. However, depending on the shooting purposes, the preferences for the sights vary. Therefore, this discussion will show which sight you should choose according to your shooting needs (civilian or tactical).

    Construction

    The construction material can create a big difference in the sight’s quality. Though these two sights are crafted with high quality materials, they still have a few differences in their construction.

    Holosun 510c: This model has Aluminum made housing and a Titanium hood to protect the sight lens. This makes the sight extremely durable against heavy impacts of recoils. Plus, the windage and elevation turrets are recessed into the sight housing. As a result, their adjustments don’t get changed in bumpy or rough situations.

    With the 0.5 per click adjustment system, you can easily adjust the windage and elevation. To make the windage and elevation adjustments, you can use either a screwdriver or a rim of a cartridge.

    In addition, the sight is submersible up to 3ft. or 1 meter. It means it also has a strong resistance against water or foggy environments.

    EOTECH XPS2: On the other hand, this model has Aluminum construction in both housing and hood. Plus, it has similar windage and elevation turret placements. Its adjustment system is similar to the Holosun 510c.

    However, they have huge differences in their submersion level and weight. While the EOTech XPS2 has a better water difference, the Holosun 510c has less weight than the former model. The EOTECH XPS2 is submersible up to 10ft. (3m) which is much higher than the 510c (3ft. Or 1m). But when the 510c weighs around 4.94 oz, the XPS2 weighs 9.0 oz.

    However, let’s not forget, the 510c is an open sight which means the mud and debris will be more stuck to it than the XPS2. Moreover, the XPS2 model has gone through the military drop tests and got approved as a military grade sight. Hence, in terms of sight reliability, the EOTECH XPS2 weighs over than the Holosun 510c.

    Reticle

    The reticle systems of the sights are equally good for fast target acquisition. But they have different MOA circle sizes which may matter to some of you.

    Holosun 510c: Honestly one of the cool features of this model is its Multi Reticle System (MRS) where you get 3 reticle options to aim for the targets, such as:

    • A 2 MOA dot
    • A 2 MOA dot with a 65 MOA ring around it (Circle Dot Reticle)
    • A 65 MOA ring (no dot in the center)

    The 2 MOA dot is always best for target acquisition from different shooting ranges. But a 65 MOA circle is what mainly enables you to aim for the targets as fast as possible. You can easily switch the reticle types by using the “-” button of the brightness adjustment. Moreover, there is another version of this which comes with a green reticle color.

    EOTECH XPS2: The XPS2 has a series of holographic sights with different reticle options. This series has total 3 reticle types, such as:

    • 1 MOA dot reticle
    • 1 MOA dot with a 68 MOA ring around it (Circle Dot Reticle)
    • (2) 1 MOA dot with a 68 MOA ring around it (Circle Dot Reticle)

    Since the MOA circle of this model is a bit larger than the 510c model, some shooters may prefer it more than the 510c model. However, there is a big BUT here! While the 510c offers you all these three reticle systems at a time, with the XPS2 model you need to purchase different versions of it to use different sorts of reticles.

    Hence, even though XPS2 has a larger MOA circle, buying the 510c would be more beneficial for you. Because, with this sight, you will also be able to make quick aim on the targets and will have 3 reticle types in one single model.

    Battery

    Without a high capacity battery, a sight will never be able to support you for a long time. Hence, whenever you purchase a sight, ensure it is provided with a good quality battery.

    Holosun 510c: This sight is offered with a high capacity CR2032 battery. It will help you to use the sight for up to 50,000 hours of battery life. The best part of this model is its features like Solar Power Failsafe Technology and Shake Awake Technology.

    The solar panel system of the optic never lets it die in the field. Because as soon as the battery fails, this solar panel technology powers up the sight to function. On the other hand, the Shake Awake Technology works to prolong the battery life by shutting it off when it is not in motion. It can also instantly power it back when it senses movements of the sight.

    EOTECH XPS2: The sight is offered with a CR123 battery which allows you to use the sight for up to 1000 hours. So, you can clearly see that the battery life of this sight is a lot lower than the 510c model. However, this is like 510c, has the automatic shutdown feature, after 4 or 8 hours of inactivity the optic can be automatically shut off.

    But it can’t automatically turn itself on. You have to power it back manually. Plus, the optic can let you know if the battery is running low. If you see the reticle flash for a moment when you first turn it on, it’s a sign that the battery power is low.

    All in all, the power backup is really stronger in the 510c than the XPS2.

    Brightness Adjustment

    The sight you’re choosing should allow you to make proper brightness adjustments. otherwise, you won’t be able to have a clear view of the targets to make accurate shots of them.

    Holosun 510c: There are 12 brightness adjustment settings in the Holosun 510c. You will have 10 level settings for daylight time brightness adjustment. Plus, 2 night modes to have target visibility in low light conditions. So, this model is compatible to be used in any lighting conditions.

    EOTECH XPS2: Conversely, this model has 20 daylight brightness adjustment systems. Hence, obviously, you’ll get more daylight brightness settings with XPS2. However, this sight doesn’t have night vision compatibility. It means you won’t be able to use it in low light conditions.

    But since this has a compact design, it doesn’t take much of the rail space, so you can use night sights along with it. Then again you have to invest a good amount of money to purchase a night sight to have target visibility in low light environments.

    Therefore, in terms of the brightness adjustment, the Holosun 510c has better settings than the XPS2. At least, you won’t need to invest extra money to have low light visibility.

    Accessories

    The sights are provided with a certain amount of accessories. So, you can also compare that at the given price of the products, what else you are getting with them.

    Holosun 510c: Following is the list of the items you will get with this sight:

    • T10 L key
    • Absolute Co-witness QD mount
    • User manual
    • CR2032 battery
    • Lens cloth

    The best part of this model is if you own a rifle like AR-15, you don’t have to buy a mount separately. Additionally, it will help you to co-witness with the iron sights as well.

    EOTECH XPS2: Below is the list of the accessories that are offered with this sight:

    • Quick-start guide
    • Warranty card
    • CR123 battery
    • Protective case

    In addition, the sight has an attached mount which enables you to install it on any 1” Weaver or MIL-STD 1913 rails. Especially, if you have an AR-15 rifle, it will allow you to Absolute Co-witness with the iron sights.

    The difference between the sights in this regard is that the 510c model has a QD mount, enabling you to quickly attach or detach the mount from the rifle.

    Warranty

    Due to many reasons, we often face technical problems with our sights. So, if the company provides a warranty with the product, it works as an assurance that we’ve got covered with technical support.

    Holosun 510c: Holosun offers 5 years of warranty for its optical system. Plus, a 3 year warranty for its illumination and electronics. Since the sight has a sturdy construction, you may not even have to use the warranty card. But the company still has got your back for a good amount of time.

    EOTECH XPS2: You will get 10 years of warranty with this optic. The warranty policy covers defects in quality and material wear under regular use. Along with the military drop tests, we believe this warranty policy takes the product’s reliability to another height.

    Hence, in the case of the warranty policy, the ball is in the XPS2’s court.

    Conclusion

    Before you go for the final verdict, let’s quickly take a glimpse of which sight works at its best in the factors we have discussed above.

    FactorsHolosun 510cEOTECH XPS2
    Construction
    Reticle
    Battery
    Brightness Adjustment
    Accessories
    Warranty

    Well, we believe you got the idea of who wins the battle here. To help you further, let’s inform you, that the Holosun 510 comes at the half price of the XPS2. So, we would say if you use civilian sorts of rifles and most importantly if you’re on a budget, the 510c is your best bet.

    However, in case you want to experience something military grade, you can go for the XPS2 sight as well. But keep in mind, for that, you will need to invest a bit more than the 510c sight. So hopefully, now you will be able to make a better decision while picking a sight for your rifle. Good luck!

  • Holosun 507C VS 510C [Which One Is Better?]

    The Holosun 507c and 510c are both open reflex sights. They allow the shooters to aim with both eyes open. Even though the sights are not magnified, you can still make quick shots on your targets.

    However, shooters often feel confused while purchasing the optics. Since the features of the sights are quite the same, it becomes a bit difficult to make a choice between them. Hence, we have brought you a comparative discussion on these products so that you can make the right decision in picking up the reflex sights. So, let’s begin!

    Holosun HS507C

    Key Features

    • Lightweight and compact.
    • Solar failsafe.
    • Incredible battery life.
    • Fully multi-coated lens.
    • Suitable for handguns and as a canted sight.

    Holosun H507C was an upgrade on the original 507 and it added some extra features that come in handy. One of the main selling points of this optic is the solar failsafe.

    If your battery dies on you during the day, the solar failsafe will kick in and keep your optic running. Thanks to the durable exterior and lens material, the optic will also last you a long time in harsh weather and shooting conditions.

    On top of that, it also is rated to be submersible. While I don’t necessarily recommend anyone to test that out, but hey, if you want to, you can! It’s also a slightly smaller optic and is suitable for handguns.

    Holosun HS510C

    Key Features

    • Compact and lightweight.
    • Suitable for all sorts of rifles.
    • Quick release mounting system.
    • Great battery life.
    • Water, fog, and shockproof.

    When you look at both of the optics at first, they are not nearly identical in looks or performance. The 510C is slightly bigger in size and features a fully multi-coated lens with a wider field of view.

    While it technically is the “better” optic in this conversation, it lacks one thing. The solar failsafe. Instead, you will get a battery that is promised to run for 50,000 hours at the lowest brightness setting. Of course, it will vary depending on your usage and the brightness level you are comfortable with.

    As for the optic itself, you can be as comfortable as you want. With unlimited eye relief and a great exterior, the optic will easily outlast any optic you have in your arsenal. Just like the other Holosun optics, this one is also rated to be submersible. Overall, an excellent choice for all sorts of firearms.

    Specs

    SpecsVortex Spitfire 3XBurris 332
    ReticleMulti Reticle SystemMulti Reticle System
    Reticle ColorRed, GreenRed, Green
    Housing Material7075 T6 AluminumAluminum and Titanium
    Multi-coated LensYesYes
    SubmersionIP67IP67
    Weight1.5 oz.4.94 oz.
    Power SourceSolar & BatterySolar & Battery
    Battery TypeCR1632CR2032
    Battery Life (Hours)5000050000
    Brightness Setting10 DL&2 NV10 DL&2 NV
    Adjustment Per Click1 MOA0.5 MOA

    Holosun 507C/ 510C – Differences

    From the table above, you can see technically the sights do have some differences. And these differences can influence your shooting experience. So, to understand these factors better we will be comparing the sights in the following terms:

    • Since the sights are used for different applications, they have quite dissimilarities in their designs.
    • Holosun has two separate housing materials to construct the sights. So we will be looking at the impacts of these materials on the sights.
    • Even though both of the optics have a Multi Reticle System (MRS), they have different types of reticle circles.
    • The sights are provided with different sorts of battery types. Hence, we will discuss how these batteries make an impact on their serviceability.
    • The products are offered with various accessories. So, we will be discussing this factor as well.

    Discussion On The Sights

    Note that, the discussion we’re doing is solely to give you a clear idea of how the sights are different and how these differences can impact your shooting experience. It doesn’t mean the sights are less than each other. It’s just they are not for all sorts of shooting needs.

    Design

    The sights are designed depending on the different firearm applications. The main difference between these two sights is that they have been engineered for two separate sorts of firearms.

    Holosun 507c: This open reflex sight is designed for pistol applications. So whether you have a defense carry gun or shooting practice gun, you can consider this sight. The optic is offered with a lock mode and button design.

    When you activate the lock mode, it helps you to fix your button adjustment for brightness settings. So even if you use it in bumpy conditions, the brightness adjustment you made won’t change. Moreover, this optic has Trijicon’s footprint. Therefore, if your gun has a similar footprint, 507c will be perfect for you.

    Holosun 510c: On the other hand, the 510c is for rifle or carbine applications. So, you can consider buying this sight if you own a rifle or any carbine firearms. It may not provide you the added advantage of the locking mode of the buttons. But this optic has a bigger window than the 507c sight.

    So, choosing one of the sights predominantly depends on what sort of firearm you own.

    Construction

    To ensure the optic’s durability, it is important that it has been constructed with high quality materials. Therefore, whenever you purchase a sight, check whether it has durable construction or not.

    Holosun 507c: The optic has been crafted with 7075 T6 Aluminum. Due to its construction, you will find this sight extremely durable. It can easily withstand recoils or impacts. Plus, it has an anodized surface coating that protects it from different outer elements. So, it is perfect to use in all environmental conditions.

    Besides, the sight lens has multi-coating to maximize light transmission through the glasses. In fact, Holosun has carefully constructed the windage and elevation turrets to be recessed into the sight housing.

    This way the adjustment will remain intact under rough situations. So, with a 1 MOA per click adjustment system, you can easily change the windage and elevation adjustments.

    Holosun 510c: Conversely, this optic is made of Aluminum and Titanium. It also makes the optics sturdy enough to sustain any weather or environmental conditions. But the problem is it puts extra grams on your rifle once you mount it. So, compared to the 507c, this one weighs a bit higher.

    Other than that, 510c also has multi-coated lenses and the same windage and elevation placements. You can quickly adjust your windage or elevation with a screwdriver or the rim of a cartridge. This optic has a 0.5 MOA per click adjustment system to change the windage and elevation adjustments.

    So, if you want something sturdy and lightweight at the same time, your bet should be on the 507c model.

    Reticle

    The durable construction won’t matter if the reticle of the sights doesn’t help you in making fast target acquisition. Hence while buying any optic always check whether it has the reticle type you need for your shooting purposes.

    Holosun 507c: Since the optic is designed to have Multi Reticle System, here you will 3 options in reticles such as:

    • A 2 MOA dot
    • A 2 MOA dot with a 32 MOA ring around it (Circle Dot Reticle)
    • A 32 MOA ring (no dot in the center)

    Plus, the reticle of this sight is offered in both red and green colors. So, you can choose the color according to your preference.

    Holosun 510c: Similar to the 507c, this sight is also offered with three reticle system, as in:

    • A 2 MOA dot
    • A 2 MOA dot with a 65 MOA ring around it (Circle Dot Reticle)
    • A 65 MOA ring (no dot in the center)

    But the difference is the reticle ring of 510c is larger than the 507c. Due to this reason, with this sight, you can aim at your target much quicker. Moreover, on this sight, you will get the option to choose your preferable reticle color. Because it also comes with red and green colored reticles.

    Therefore, if you want to aim faster, your best call is 510c sight.

    Battery

    In order to use the sights for a longer period of time, it is important that they come with a high capacity battery to operate. Hence, always check if your selected optic has a good quality battery or not.

    Holosun 507c: With this sight you will get a CR1632 battery. It can support up to 50,000 hours of battery life. The interesting features of this optic are its Solar Power Failsafe Technology and Shake Awake Technology.

    The provided solar panel system allows you to use the sight when the battery fails. It means your optic will never leave you hanging out to dry if the battery fails to function. Additionally, the Shake Awake Technology works to preserve the battery life.

    When your sight remains inactive for a long time, this system automatically shuts off the LED and preserves the battery energy. However, it can instantly power it up when it senses motion in the sight again.

    Plus, you will have a 10 level daytime brightness setting and 2 night modes with this sight.

    Holosun 510c: This optic comes with a CR2032 battery. Like the CR1632 battery, this one can work up to 50000 hours of battery life. The good part is that 510c is also provided with Solar Power Failsafe Technology and Shake Awake Technology.

    These systems come as a great help in prolonging the battery life. Additionally, the sight has a 10 level daytime brightness setting and 2 night modes, enabling you to aim for the target in any lighting conditions.

    So, even if the sights are provided with different types of batteries, they can last pretty much at the same duration of time.

    Accessories

    Both of the sights are provided with a certain amount of accessories. Hence, given the price of the sights, it is essential to know what sorts of additional items you’re getting with them.

    Holosun 507c: Along with this optic, you will get the following accessories:

    • T10 L key
    • User manual
    • CR1632 battery
    • Lens cloth

    Since the sight is not provided with a mount, you need to purchase it separately. Especially, if you’re interested in installing it on the AR platform rifle or pistol, you have to buy high mounts for it. Otherwise, low mounts will be right for the sight.

    Holosun 510c: Below is the list of accessories included with this sight:

    • T10 L key
    • Absolute Co-witness QD mount
    • User manual
    • CR2032 battery
    • Lens cloth

    The good part of the sight is its QD mount. If you have an AR-15 or other AR platform firearms, it will allow you to co-witness with the iron sights. However, if you have a shotgun or an AK rifle, you might find the mount sets a bit higher in the platforms.

    The price of the sights are more or less the same. So, given the price, the accessories provided with the 510c are more economical than the 507c.

    Conclusion

    In the end, the choice of the optic comes down to you. If you own a pistol, the 507c will be the right choice. However, you can also use it on the AR platform rifle but for that, you’ll need to buy a high mount to attach the sight. Plus, if you want a lightweight sight, this sight is your best bet.

    But if you want faster target acquisition, you can consider the 510c as a viable option. Additionally, by choosing the 510c, you may save your money from purchasing a mount to install it.

    So, we would suggest you to go through the comparison by keeping your shooting needs in mind. This way you will definitely be able to choose the right sight for you.

  • Aimpoint Acro P2 Vs C2 [Which One Is Better?]

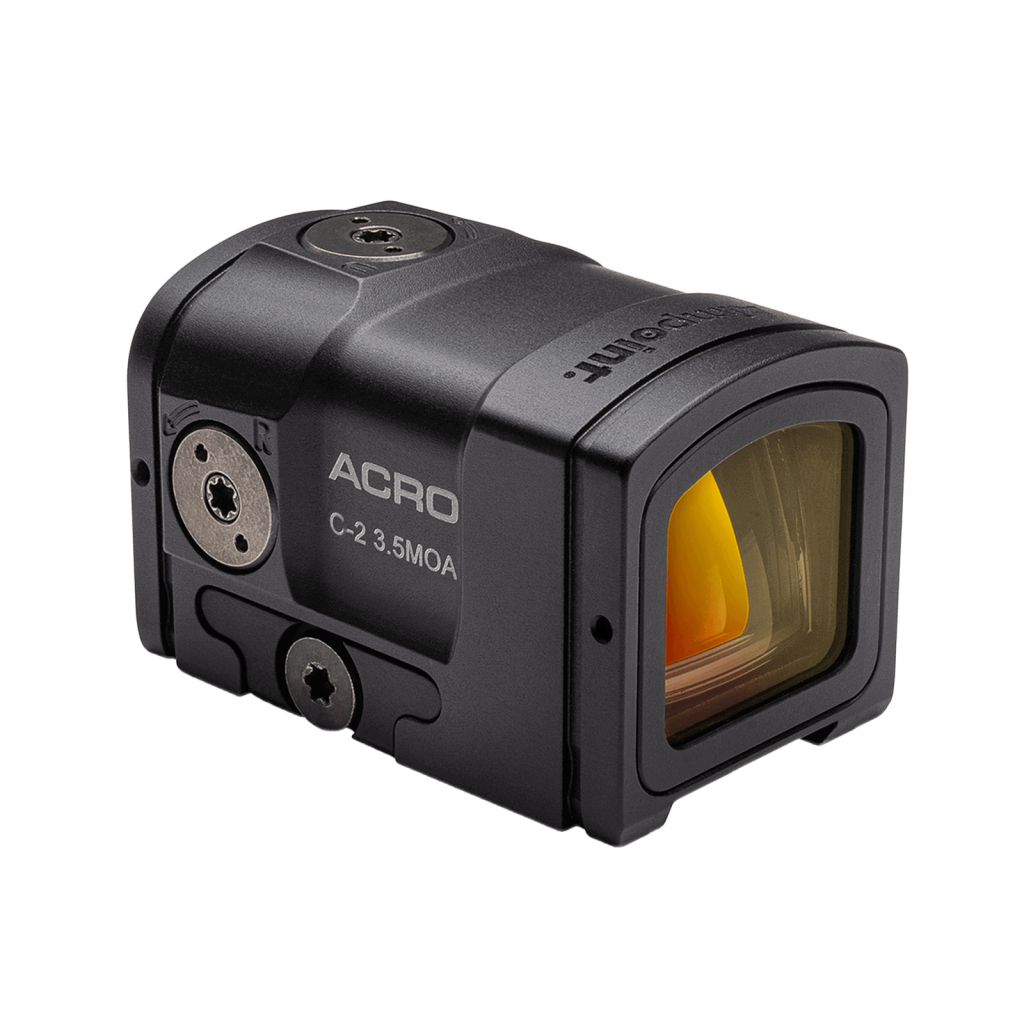
    Aimpoint Acro P2 and C2 are part of the same Acro family that has their own mounting interface and is popular for that. Like most of the other Aimpoint sights, these two are way too similar.

    At a glance, you won’t find any difference between the two. Besides some small craftsmanship improvements, both of these two are the same. From weight to size to look, everything is the same. Then why is there a debate between Aimpoint Acro P2 vs C2? Let’s find out and solve that debate.

    Aimpoint Acro P2

    Key Features

    • 35 meters of water resistance.
    • Made for Police and Military usage.
    • Suitable for all weathers.
    • Lightweight and extremely compact.
    • Easy to adjust.

    Aimpoint makes really good red dot and reflex sights, there is no way of denying that. While their pricing isn’t atrocious like most others, they are not the cheapest company on the planet. Their Acro series has a reputation for upholding price-to-performance. The P2 is a part of that tiny family offering a great 1x red dpt experience.

    The sight is made out of high-quality 7075-T6 High-strength Aluminum. With a hard-anodized coating, the sight offers unparalleled strength when it comes to the build quality!

    As for the lens, it is also fully multi-coated. Lens coating has always been a strong suit of Aimpoint. You can also use this optic under heavy sun or in rainy weather. With a waterproofing rating of up to 35 meters, a little bit of rain won’t be able to do anything to the optic.

    Aimpoint Acro C2

    Key Features

    • Made for civilian use.
    • Suitable for any handguns.
    • Great field of view.
    • Generous eye relief.
    • Lightweight and compact.

    When you first take a look at both, you might be like, why am I recommending two of the same sight? Well, I can’t blame you. Acro P2 and C2 do look nearly identical.

    They share a similar housing and their size is also quite similar. C2 is constructed from waterproof aluminum and it’s purged to be fogproof as well. On top of that, it also shares the same fully multi-coated lens with great brightness control.

    C2 has a similar waterproof rating and it’s also suitable for different weathers. No matter the time of the day, it will help you push through your shooting sessions easily.

    Specs

    SpecsAimpoint Acro P2Aimpoint Acro C2
    Magnification1x1x
    Weight60 grams (w/o mount)60 grams (w/o mount)
    Size1.9 x 1.3 x 1.2 in1.9 x 1.3 x 1.2 in
    Red Dot Size3.5 MOA3.5 MOA
    Waterproofing35m5m

    Aimpoint Acro P2 & C2 – Key Differences

    Let’s see if they are any different at all.

    • Acro C2 has less waterproofing compared to P2.
    • Aimpoint Acro C2 has a more daylight setting.
    • P2 has better optical transmission.
    • P2 has no optical signature visible at 10m.
    • Both of them are night vision devices compatible.

    Which One to Choose Then?

    Let’s explore and decide, shall we?

    Mounting System

    P2: The mounting system on both of the Acro systems is the same. P2 uses the Acro interface which is quite easy to install and fits on the pistol top as well. This is why a lot of shooters like the Acro series. You can easily take it off the pistol and use it on your rifle. Just like that.

    C2: The C2 also uses the same Acro interface system. It’s quite easy to install on top of a rifle or a pistol. You name it. Taking it off is easy as well. Although it’s not a quick detach, you can still remove it relatively quickly.

    In terms of mounting systems, they both are the same. Based on this, it’s not possible to choose a better one between the two.

    Size and Weight

    P2: Unironically the size of P2 and the C2 is the same. As I said earlier, they are the same picture. The length of the P2 is 1.9 inches. It’s extremely compact. That’s the reason why it’s suitable for pistol users as well. Without the Acro mount, the weight of the Acro P2 is only 60 grams. That’s extremely light.

    C2: C2 and P2 look completely alike. If someone holds both in front of you, you won’t be able to tell them apart. C2 is also 1.9 inches long and weighs 60 grams without a mounting system. Even with a mounting system, they are extremely light red dot sights.

    Here is another term they are similar to. It’s almost as if they are made out of the same module with just some interchanges.

    Durability

    P2: Another concerning thing about these small sights is their structure. How durable they are. As they are quite light, folks are afraid that their rifles might tear them apart. But that’s not the case. The Aimpoint Acro P2 is made out of high-quality aluminum. It’s lightweight as stated earlier and is extremely rugged. The exterior has a nice texture to it as well. It will easily last you for a good while.

    C2: The choice of material here is high-strength aluminum. The type of aluminum you see in tube red dot sights and full sized riflescopes. It has an anodized finish on top of it to make it scratch resistant. The sight is also water, shock, and fog proof. Just like the p2. It will also last you for a long time.

    They are both durable and made out of the same high strength aluminum. They have a textured anodized finish that protects them from drops and accidents. Overall, they both are extremely durable sights.

    Lens Clarity

    P2: In my opinion, lenses are the most important part of a sight. If the lens isn’t durable and clean, the experience will be muddy and feel awful. Thankfully, the lenses on P2 are made out of glass and they are extremely durable.

    With fully multi-coating and scratch resistant coating, it’s one beautiful looking sight. Even during low light, the performance is really good.

    C2: The C2 has the same exact lens as the P2. As you read moments ago, C2 also has a fully multi-coated lens with scratch and anti-glare coating on it. They are extremely bright and gather a lot of sunlight to work with. Low-light performance is impeccable and there is no chromatic aberration.

    In terms of vision, they both go neck to neck. After all, it was made by Aimpoint.

    Reticle and Battery

    P2: The reticle on Acro P2 is a 3.5 MOA red dot. It’s etched on the glass directly and you can illuminate it with the help of a battery. It uses a single CR2032 battery tucked into a waterproof housing. The battery is capable of running the sight for around 50k hours at low-brightness settings.

    Speaking of brightness, it has 6 daylight brightness settings and 4 night vision settings.

    C2: The C2 has the same 3.5 MOA reticle etched into the glass. It is also powered by a single CR2032 battery. At low brightness, you will be able to use it for at least 50k hours with a single battery. This is where the C2 lacks a bit.

    Instead of 4 night vision settings, there are only 2 adjustable night vision settings present on the optic. Instead of those 2 extra night vision settings, they added 2 extra levels on the daylight setting.

    There you have it. A deciding factor. If you want more night vision, then P2 is the obvious option.

    Conclusion

    While some of you would still argue that Aimpoint Acro P1 vs P2 had better value, that’s still not the topic of today. My mission was to help you decide between the Aimpoint Acro P2 vs C2, and I believe I managed to do that.

    The differences are quite small and easily negligible. If you already have one of these in your possession, you don’t need to sidegrade to the other one. If you don’t have either, then you can’t go wrong with either P2 or C2. If those small changes mean big to you, then the decision is easy for you.

    That’s all for now, I will see you at the next one.

  • Holosun HM3X Vs HM3XT [Which One Is Better?]

    Another day, another Holosun massacred its own. Jokes apart, the competition Holosun gives to its own products is more than it gives to others. Each year they tend to release a refresh or some sort of upgrade of their own existing lineup. Holosun HM3X and Holosun HM3XT both are Holosun magnifiers.

    They are compatible with red dot sights from Holosun as well. If you own a sight and now want to get the best magnifier for your Holosun, this post will help you a lot.

    Besides having an extra T at the end of the name, do they have any differences? Don’t worry, we will know that soon enough. Let’s find out which one is the best between Holosun HM3X and HM3XT.

    Holosun HM3X

    Key Features

    • Extremely lightweight at 11.6 oz.
    • Great field of view.
    • Good viewing angles.
    • Flip to the side mounting system.
    • 3.9 in length.

    Just like their optics, Holosun made a name for themselves in the magnifier industry as well. A good thing about Holosun Optic is, that they support other brands’ magnifiers. But if you want to keep it in the ecosystem, then HM3X will automatically come to your consideration.

    This 3X magnifier is held captive inside an aluminum housing. The housing is extremely durable and lightweight. It is rated to be waterproof and fogproof. As for the lens itself, it’s fully multi-coated. It has a wide field of view with great viewing angles.

    The eye relief is not that big coming at 2.75 in. But it’s more than enough for a shooter with glasses on. There have been no issues with internal fogging or the magnifier not working during low-light conditions. If you are looking for a magnifier for your HS series sights, the HM3X is one of the best in the field!

    Holosun HM3XT

    Key Features

    • QD mount with spacers.
    • 2.75 in of eye relief.
    • Shorter overall length.
    • Better flip to the side mechanism.
    • Great field of view.

    Holosun’s tendency to upgrade an existing product to the absolute brim remains true here. While the HM3X is not that old nor that expensive, they soon released an upgraded version of it with a different outlook and smaller housing.

    HM3XT is 2.65 in long compared to 3.9 of HM3X and it also has the adjustment values positioned a bit towards the end compared to the middle of the HM3X. If you are looking for a compact, lightweight, and extremely well-built 3x magnifier, then HM3XT might take the cake for you!

    It also uses the same high-quality CNC machined housing that has been purged to be fogproof, shockproof, and waterproof. The lens is also fully multi-coated and you can see your target throughout the entire day without any obstructions. The eye relief at 2.75 in is also generous. Perfect for shooters who wear glasses.

    Specs

    SpecsHM3XHM3XT
    Magnification3X3X
    Field of view37 ft at 100 yards37 ft at 100 yards
    Waterproof1m1m
    Length4.1 inches3.2 inches
    Weight9.5 ounces11.6 ounces

    Holosun HM3X and HM3XT – Key Differences

    They look pretty similar, right?

    Yes, and no. They have identical specs but they don’t look similar visually at all. They have some distinct differences as well.

    • Holosun HM3XT is a lot heavier than HM3X.
    • Holosun HM3XT is made out of titanium.
    • Holosun HM3X is made out of aluminum.
    • Easy to zero in on both.
    • The field of view is the same.

    Let’s Take a Look at which One is Better for You

    Build Quality

    HM3X: The first thing you notice in these two is they are not built the same. From material to mold, everything is quite different between the two. HM3X is made out of traditional high-strength aluminum. It’s lighter and it’s durable. It has an anodized finish to it that makes it look premium. It’s not immune to scratches but a simple drop or two won’t be able to harm it anyway. It should last you for a good while.

    HM3XT: HM3XT is outright better in terms of durability. It uses more expensive and robust titanium as its housing material. The process increases the weight of this significantly. Still, it’s not 20-30oz. You cannot really call it overweight at all. The anodized finish on this looks incredible. It’s a premium magnifier through and through.

    In terms of durability, HM3XT is the clear winner here. There is no competition when it comes to titanium vs aluminum. But aluminum is incredibly durable as well. You won’t be missing that much by grabbing HM3X if you are on a tighter budget.

    Lens Clarity

    HM3X: The optical lenses used on the Holosun HM3X are incredible. They are crystal clear and extremely vibrant. There is no chromatic aberration or glaring issues present on the magnifier either. It is fogproof and waterproof. Even in heavy rain, you won’t face any issues while using this. Low-light performance is average.

    HM3XT: HM3XT uses some of the best possible lenses as well. They are fully multi-coated and they are incredibly bright and vibrant. Will give you a clear vision of the target with no hindrance and sense of aberration at all. You won’t feel like you are using two different optical instruments at the same time.

    They are both epic visually. They both will satisfy you completely. Doesn’t matter which one you opt for.

    Magnification

    HM3X: The magnification here is fixed at 3x. You are not gonna get 1x base or 2x adjustable at all. You are stuck at 3x, thus the name. At 3x magnification, it’s not optimal for medium-range hunting or target practice. But it’s perfect for short-range, airsoft, and plinking. The target is clearly visible and there are no obstructions between the magnifier and the red dot.

    HM3XT: The 3XT has the same 3X fixed magnification. It’s also optimal for the same thing HM3X is. It performs quite well in short-range shooting. At medium-range, it’s okay but not the best by any means.

    Magnification is similar if not the same. If magnification without any focus issue is your main concern, either of them will satisfy you.

    Mounting System

    HM3X: HM3X has a really unique mounting among Holosun 3x magnifiers. It’s a QD mounting system with spacers included. If you are having issues matching with your red dot, the spacers will come in handy. It’s easy to use and quite easy to zero out as well. It also features a flip to the side system.

    HM3XT: The mounting system on the 3XT is similar to the regular HM3x. It’s the same quick detach mounting system with a side flip mechanism. When you don’t want to use the magnifier, you can just flip it to the side and use the red dot sight only.

    Both of the mounting mechanisms are similar and they are great.

    Size and Weight

    HM3X: The total length of the HM3x is 4.1 inches. It’s not the smallest magnifier out there. But it’s still not as large as an LPVO. If your gun has less space in the rail, then you might have issues fitting this with your sight. Make sure that your gun rail has enough space to cover it.

    The weight is 9.5 ounces. It’s much lighter than a lot of magnifiers.

    HM3XT: The total length of the 3XT is barely 3.2 inches. It’s almost a whole inch smaller than 3X and is more compact. If you want more concealment and less presence on the gun, this is the way to go. Despite being the smaller one among the two, it’s not the lighter.

    Thanks to titanium, the weight of this is around 11.6 ounces.

    Here they both contradict each other. One is smaller but heavier the other is bigger but lighter. A dilemma indeed.

    Conclusion

    And there you have it. The most wanted comparison between Holosun HM3x vs HM3xt. Which one is the best among them then? It will boil down to your preference. If you want a more durable magnifier but don’t mind the extra weight, the obvious choice is HM3XT.

    But a lightweight magnifier is a must for you and don’t mind a bigger magnifier, then stick with HM3X and save some money. That’s all for now, I will see you guys on the next one. Take care till then.

  • What Paint To Use On Gun Sights?

    What Paint To Use On Gun Sights?

    Almost every handgun has built-in iron sights that are important for targeting accurately. Although shooters nowadays are more into using external devices for aiming such as scopes, red dot sights, holographic sights, etc. the old tradition of using the classic iron sights is still in the game.

    These sights are fairly usable and give enough support in times of need. However, sometimes shooters may find the existing iron sights’ color distracting or not useful in a particular situation. For that reason, changing the color of the iron sights and painting them into the color of their choice is very common among shooters.

    With this concept of changing the color and using a new paint on the iron sights, it can become confusing as one remains unknown to the information on which type of color will suit the most.

    What Paint To Use On Gun Sights

    There are many brands in the market that are selling different types of paints for gun sights. You will find normal paints, acrylic paints, and glowing paints for night sights. Which one do you need among these paints and what kind of benefits you will get from them, we will be discussing everything here. So, without wasting another second let’s begin!

    Reasons For Painting Gun Sights

    Before we move on to the actual section of today’s topic, let’s talk about the reasons for painting gun sights. Normally, the iron sights of any pistol come with 3 dots that are painted in white for targeting. The white paint is universal and it is most commonly used in iron sights since white is easily visible both in dark and bright light conditions.

    However, sometimes this white paint might not be best for a particular situation. The most common reason for wanting to change the color of iron sights is the worn-out condition of sights. After using it for a really long time, the dots can fade away hence needing a redo with some paints. Other than this, there are causes such as personal preference, upgrading the quality, etc.

    The Common Colors To Use On Gun Sights

    Now coming to the main part of the topic, there are several types of paints that you can use for your gun sights. Each and every paint has its own advantages and they can be used for specific purposes. We will be discussing what these benefits are and which of the paints will be better for you.

    The very common type of paint you will find in the market is the tritium vial that extracts radioactive in order to glow during nighttime so that you can use them in a low light setting. Another similar type of paint is the phosphorus paint which will provide you with similar effects.

    Other kinds of paints include premium acrylic paint and strontium aluminate glow powders. These are good for long-lasting and powerful effects. Moreover, there are new synthetic resins combined with latex paints which are more water-resistant and durable. You can easily find these kinds of paints everywhere. Some very common paints currently in the market are the Glow-on Phosphorescent Gun Night Sights Paints, Truglo Paint Kit, and Testors Enamel Paint Set.

    All these paints have their own benefits along with some downsides. We will be addressing both sides of all the paints and then you can decide which one you want to use on your gun sights.

    • White: White is the most commonly used paint on gun sights. It is versatile and easy to notice which is great for using fast targeting. You can see this paint in both daylight and low light settings. The greatest downside of white paint is that it can easily get lost among other things when used in a compact area. Therefore, it is not the best option to use for any quick critical situation.
    • Green: Green paint is another commonly used paint for gun sights as it is the first color to catch the attention of human eyesight. This mostly comes as a tritium vial to glow in the dark setting. The green paint will work best for night sights to use in low lighting. However, the radioactive coming from the tritium can be harmful for using too long.
    • Yellow: Another color option is the yellow paint. You can use yellow paints for fast targeting since human eyesight picks the yellow color faster than other paints. The only downside of this paint is that it has a reflective nature which can strain the eyes when used for a long period of time.
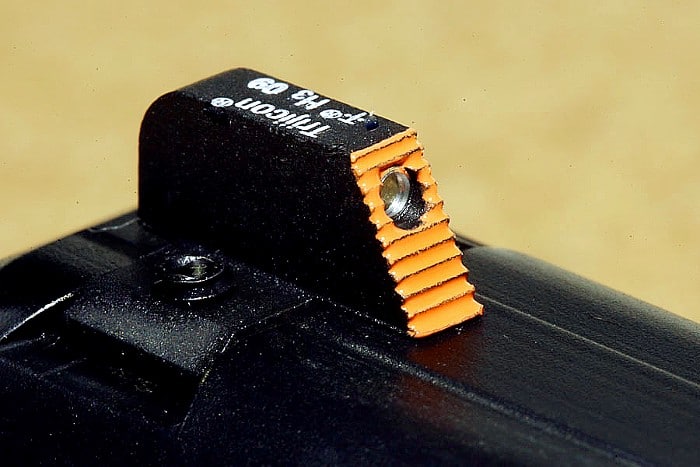
    • Orange: After the visibility rate of yellow and green comes the orange color. This paint is extremely fast to capture human eyesight and works better than a tritium vial. The orange color is also not as reflective as the yellow paint and you can easily focus without straining your eyes.

    From all the information above, we can say that green and orange are the two paints that stand out the most among other colors. Painting your gun sights with either of the colors will not only give you better accessibility but also allow you to use them in any light condition.

    How To Paint The Sights?

    There are multiple ways to paint gun sights. They are pretty simple and do not require too many instruments to work. We will discuss two alternative ways of painting your gun sights and make a list of the things you will need for them.

    The first way is very simple and requires easily accessible products. Let’s see what they are-

    • Clean and bright workspace
    • Alcohol pads or rubbing alcohol
    • Toothpick
    • Cotton swabs
    • Aceton
    • Padded clamps or gun vise

    Using this method you can very easily paint the gun sights within a few minutes. All you need to do is follow the steps mentioned below.

    • First, stand your gun in a comfortable position using a gun vise where you can paint the sights without any disturbance.
    • Then take some alcohol on a cotton swab and clean the surface of the iron sights to get rid of any external dirt or oil. Let the alcohol dry before moving on to the next step.
    • Now mix the paint you are using and use a toothpick to grab some paint on it. Using a round toothpick will give you a better finish than a sharp-edged one.
    • After that paint the iron sights starting from the edge and moving towards the end. Make sure you do not spill or use too much than necessary.
    • Let the paint dry and reapply if necessary. In case you need to reapply the paint a couple of times, use a new toothpick for every application so that you can avoid any clumpiness around the sights.

    This way you can easily retouch the paints on your iron sights without going through so much trouble.

    Another alternative way of painting your gun sights is by drilling the existing paints and then using synthetic resins to cover the hole. This way is good if you want brighter and long lasting colors. You can also look at the video below to understand the process better.

    Frequently Asked Questions

    Does nail polish work for gun sights?

    Yes, nail polish will also work for painting your gun sights. They are cheap and easily accessible. You can also change them by using acetone or nail polish remover whenever you want to repaint the sights.

    What is phosphorescent paint?

    The phosphorescent paint is a glow-in-the-dark paint that uses phosphors such as silver-activated sulfate and doped strontium illuminate. These types of paints glow in the dark setting and generally spread pale green or bluish-green light.

    How long does glow paint last?

    There is no specific timeframe for glow paints. They are not long-lasting and work after charging them with UV lights. Mostly, the glow paints last from 2 hours to 3 hours and fade away gradually with time.

    Conclusion

    To wrap up our discussion on the gun sight paints, we can say that having a certain paint on your iron sights helps you with more precise and faster targeting. There are many paints in the market with different finishes that you can use on your sights. These paints are durable and water-resistant.

    Although all these paints have their own benefits, the green and orange colors are the most popular ones as they have better performance than other colors. You can also use phosphorescent paints that give better visibility at night time. In the end, the decision will depend on your personal preference. Therefore, choose a paint that will suit your gun sights and needs the most.

  • Why Is The Marlin 1895 Sbl So Hard To Find?

    Why Is The Marlin 1895 Sbl So Hard To Find?

    Ever since Marlin introduced the 1895 SBL back in 2015, it’s been a bloodbath to find one in stock. Even if you find somewhere or someone that is selling it, they might ask for a higher price than the gun.

    As the gun is in high demand and Marlin isn’t supplying remotely enough, that’s why there has been an artificial shortage of the gun in the market. Let’s see what are the other possibilities for the shortage of this gun.

    Why Is The Marlin 1895 Sbl So Hard To Find?

    One of the main reasons why this gun is so hard is the release date. The gun is relatively new. Another key reason is the gun being a limited edition model. While Marlin only made 500 of this gun, they didn’t make it available worldwide. You could only grab one if you are from Australia, Canada, and the United States. The other reason is scalpers. A lot of people are asking 2x/3x price of the MSRP.

    The History Of Marlin 1895 Sbl

    The Marlin 1895 Sbl is a lever-action rifle. The chamber is a housing for .45-70. While the announcement of the gun was in 2015, Marlin introduced it in late 2016. The Marlin 1895 original is not a new gun.

    The SBL is part of that family with some newer features that modern hunters love. The SBL features a steel barrel and receiver. The stock is made out of wood and it has a black/gray finish to it.

    The gun is 20” in length and it’s capable of holding 6 shots. Marlin designed it for pointed bullets. They also suggested not using cast bullets with this gun.

    Why Is Marlin 1895 Sbl So Popular?

    The 1895 is very popular for several reasons. The main reason is durability and longevity. The gun can withstand a lot of abuse. The 1895 is also extremely accurate when it comes to target practice and shooting down game hunts.

    The total power of this gun is also quite good. Thanks to that, hunters absolutely adore this weapon. The gun is capable of hunting down most big-game prey. Last but not least, the gun is extremely affordable. Well, it was affordable when it was available, at least. And who doesn’t love budget guns packing monstrous energy?

    Features Of Marlin 1895 Sbl

    While it might seem like this is the best gun in history from its fame, it’s nowhere near being there. The 1894 Sbl features a stainless steel barrel and it’s a lever-action weapon.

    Lever-action weapons have a certain charm that you won’t find anywhere else. This alone made a ton of hunters instantly buy it.

    Is The Marlin 1895 SBL a Perfect Game Hunting Weapon?

    In short? Yes, it is. It’s as good as it gets. The gun is deadly accurate and it doesn’t fail to perform when it’s necessary. The gun is lightweight and it can hold 6 shots. You will have plenty of chances to recover as the recoil is quite low as well.

    And the Sbl 1895 is capable of long-range big game hunting. Thanks to that, adding a scope on top of it will make it a killer combination. Make sure to buy the best scope for Marlin 1895 Sbl. And then take it to a game hunting competition and allow the gun to wow you.

    Frequently Asked Questions

    What Is The Marlin 1895 Sbl?

    If you haven’t figured it out already, the Sbl is a limited edition high-end model of the 1895 family.

    Why Is The Marlin 1895 Sbl Always Out Of Stock?

    The gun is produced by Marlin in a limited quantity. When you add in the demand for the gun and Marlin not making nearly enough, you can get an idea of why the gun is so hard to find.

    Why Is The Marlin 1895 Sbl So Special?

    It’s a beautiful weapon. From the finish to the performance, it’s an insanely good gun. The value proposition is also one of the best in the market. And good lever-action rifles nowadays are hard to come by as well.

    What Kind of Animals Can I Hunt With The 1895 SBL?

    You can hunt a lot of game animals with this. The common ones are moose, elk, deer, and other large scale animals.

    How Much Does The Marlin 1895 Sbl Cost?

    As it’s a special edition, the gun costs around $1500-2000 in the retail market. While Marlin doesn’t support scalping, scalpers can ask for $3000 or more.

    What Are The Marlin 1895 Sbl’s Main Competitors?

    The main competition of SBL is the Ruger Guide Gun and the Winchester Model 70.

    Should I Buy The Marlin 1895 SBL?

    Yes, sir. If you have the chance to get one and find one in stock anywhere for a reasonable price, then instantly grab it. It’s one of the best hunting weapons on the market right now for the money. And let’s not forget the incredible range and animals it can pull off.

    Conclusion

    And there you have it folks. Hopefully, now you have the answer to your question. Finding out why the Marlin 1895 Sbl is so hard to find was quite necessary in my opinion. After all, without knowing the main reason one might easily pay the scalped price thinking it’s the retail price.

    That’s all for now. Thanks for reading and I hope you found this informative. Don’t forget to tune in later for more. Till then, take care and have fun.

  • Ruger LCP MAX Problems [& How To Fix Them!]

    Ruger LCP MAX Problems [& How To Fix Them!]

    The Ruger LCP Max is a great concealable carry option for everyday use. It can be hidden inside holsters with a sight. The weight distribution of this gun is excellent and the build quality is something exceptional as well.

    This popular compact pistol has been praised for its size and reliability, but like any firearm, it’s not immune to occasional issues. In fact, if you search about it, you will find more Ruger LCP problem posts than solutions. Some people got fed up to the point where they ended up selling the gun as well. If you are planning to buy the Ruger LCP MAX or are an owner of it, this guide will help both parties regardless.

    Let’s bring on the problems and I bring on the solution, sounds like a good deal, right? Let’s go!

    1. Failure to Feed

    A common problem experienced by Ruger LCP Max users is a failure to feed, where the pistol fails to load the next round from the magazine into the chamber properly. This issue can be caused by various factors, including:

    • Improperly seated magazine: Ensure that the magazine is fully seated and locked in the pistol.
    • Weak magazine spring: Consider replacing the magazine spring if it appears visibly worn or weak.
    • Dirty or damaged chamber: Clean the chamber thoroughly, removing any debris or fouling that may obstruct the feeding process.
    • Weak grip: Very often you will see this issue occur with a soft grip. To fix this issue make sure to focus on maintaining a firm grip while shooting to allow for proper cycling.

    2. Failure to Eject

    Another common issue with the Ruger LCP Max is failure to eject, where spent casings remain in the chamber instead of being ejected properly. This problem can be caused by:

    • Weak or damaged extractor: Properly inspect the extractor for any signs of wear and damage. Do consider replacing it if it comes to that.
    • Dirty or obstructed ejection port: Make sure to properly clean the ejection port. Remove any accumulated dirt and debris that can hinder the ejection process.
    • Limbs and clothing interfering with the ejection process: Make sure that your clothing, gloves, or grip isn’t interfering with the shooting process. If it is, make sure to remove that hindrance to have a smooth shooting experience.

    3. Trigger Issues

    Some Ruger LCP Max owners may experience trigger-related problems, such as a gritty or heavy trigger pull, or a trigger that fails to reset properly. These issues can adversely affect the accuracy and overall shooting experience. Possible causes for trigger issues include:

    • Dirty or gummed-up trigger mechanism: Clean the trigger mechanism using an appropriate cleaner and lubricant, ensuring smooth operation.
    • Weak or damaged trigger return spring: If the trigger return spring appears worn or weak, consider replacing it to ensure proper reset.
    • Improper trigger maintenance: Regularly maintain and clean the trigger to prevent the build-up of dirt and debris.

    4. Magazine Release Issues

    Some Ruger LCP MAX users have reported issues with the magazine release, including unintentional magazine drops or difficulty in releasing the magazine. These problems can be attributed to:

    • Weak magazine release spring: Sometimes the spring in the magazine tends to break or is just worn out from action over and over again. If this is true in your case, then consider replacing the spring for more reliable performance.
    • Inadequate grip technique: Practice proper grip technique to avoid unintentional magazine drops while shooting
    • Obstructed or damaged magazine release button: Regularly clean and inspect the magazine release button for any obstructions or damage that may hinder its operation

    5. Slide Issues

    In some cases, Ruger LCP Max owners may encounter problems related to the slide, such as difficulty in manually manipulating the slide or failure to lock back after the last shot. These issues can have several potential causes:

    • Dirt or debris obstructing the slide’s movement: Thoroughly clean the slide, removing any dirt or debris that may impede its movement
    • Weak or damaged recoil spring assembly: If the recoil spring assembly appears worn or weak, consider replacing it for optimal functioning
    • Improper grip technique affecting slide manipulation: Focus on maintaining a firm grip while manipulating the slide to ensure proper cycling

    Frequently Asked Questions

    1. Why is my Ruger LCP Max stovepiping frequently?

    The Ruger LCP Max may experience stovepipe malfunctions due to weak ejection or improper magazine seating. Ensure a firm grip, check if the magazine is properly inserted, and consider cleaning and lubricating the gun.

    2. What can I do to fix the slide not locking back on empty magazines issue?

    To address the slide not locking back on empty magazines problem, ensure your grip does not interfere with the slide stop lever. Additionally, check for proper magazine seating, and consider replacing the magazine springs if necessary.

    3. Why does my Ruger LCP Max have a stiff slide that’s hard to rack?

    If the slide on your Ruger LCP Max is difficult to rack, ensure the gun is properly lubricated. You can also try using the “slingshot” method – instead of using the slide stop lever – to release the slide. Proper technique and regular maintenance can alleviate this issue.

    4. How do I address accuracy problems with my Ruger LCP Max?

    To improve accuracy with your Ruger LCP Max, focus on your shooting technique by maintaining a firm grip and consistent trigger pull. Experiment with different types of ammunition to find the most accurate option for your gun. Regular practice and proper sighting can also enhance accuracy.

    Final Thoughts

    In conclusion, the Ruger LCP Max has encountered several issues that have affected its performance and reliability. These problems include frequent jamming, inconsistent accuracy, and difficulty in slide manipulation. While the pistol offers a compact design and ease of carry, these problems outweigh its benefits.

    Regular maintenance, thorough cleaning, and proper technique are key to resolving and preventing these problems. If you encounter persistent or unresolved issues, it is recommended to consult with a qualified gunsmith or contact Ruger’s customer service for further assistance.

    Still, it is crucial to thoroughly research and consider other firearms options before making a purchase decision.

  • Sig P365 XL Problems [& How To Fix Them!]

    Sig P365 XL Problems [& How To Fix Them!]

    Choosing a correct everyday carry has always been an important decision. If the weapon isn’t up to the mark or not giving you a clean shooting experience, it will be hard to consider as an option. Sig P365 XL is a wonderful weapon loved by many. It’s also a great option for budget adventurers.

    While Sig did manage to provide the shooters with a great experience thus far, it’s not all rainbow and sunshine. Like many other handguns, the Sig P365 XL also faces some problems. Most of them are fixable, but some of them can require you to head towards a gunsmith or claim help from Sig themselves.

    I’m here to help you figure out the problems of Sig P365 XL and try to provide you with some solutions as well. With that in mind, let’s move on to the main dish!

    Sig P365 XL Problems: Understanding and Troubleshooting

    Are you a proud owner of the Sig P365 XL or planning to purchase one? The Sig P365 XL is a popular choice among firearm enthusiasts for its compact size, high capacity, and excellent performance. However, like any firearm, it may encounter certain issues that can affect its reliability and user experience.

    In this article, we will explore some common Sig P365 XL problems that shooters may encounter and provide helpful troubleshooting tips and solutions. So, let’s dive in and ensure you have a smooth and trouble-free shooting experience with your Sig P365 XL.

    1. Failure to Feed

    A failure to feed is one of the most frequent issues reported among Sig P365 XL owners. This occurs when a round fails to properly enter the chamber or feed ramp, resulting in a malfunction. Here are a few potential causes and solutions:

    • Incorrect magazine seating: Ensure that the magazine is inserted correctly and locked into place. A loose or improperly seated magazine can cause feeding issues.
    • Dirty or damaged magazines: Clean your magazines regularly and inspect them for any signs of damage. Bent feeding lips or a dirty follower can impede proper feeding.
    • Improper ammunition: Ensure that you are using quality ammunition that meets the specifications outlined by Sig Sauer. Using substandard or reloaded ammunition can lead to feeding problems.
    • Weak magazine springs: Over time, magazine springs may weaken, causing feeding issues. Consider replacing the springs if you suspect this to be the cause.

    2. Failure to Eject

    Another common problem reported by Sig P365 XL owners is a failure to eject spent casings. This issue can be frustrating and may prevent you from firing subsequent rounds. Here’s what you can do to address it:

    • Dirty or obstructed ejection port: Clean the ejection port thoroughly, removing any debris or fouling that may be obstructing the ejection process.
    • Weak or damaged extractor spring: Inspect the extractor spring for signs of wear or damage. Replace it if necessary, as a weak extractor spring can lead to failure to eject.
    • LimPing grip: In some cases, failure to eject can be related to a weak grip on the firearm. Ensure that you maintain a firm and consistent grip to allow for proper cycling.
    • Ammunition-related issues: Low-powered or undercharged ammunition can cause failures to eject. Experiment with different ammunition brands to see if the problem persists.

    3. Light Strikes or Failure to Fire

    Experiencing light strikes or failure-to-fire issues can be a frustrating and potentially dangerous problem. If you encounter this issue with your Sig P365 XL, consider the following solutions:

    • Check the firing pin: Inspect the firing pin for any obstructions or damage. Clean it thoroughly and ensure that it moves freely.
    • Dirty or damaged firing pin channel: Clean the firing pin channel using an appropriate solvent and ensure it is free from any debris or fouling.
    • Check your ammunition: Ensure that you are using quality ammunition and that it is seated properly in the chamber. Check for any primers that may not be properly seated.
    • Weak or damaged striker spring: A weak striker spring can cause light strikes. Consider replacing the spring if necessary.

    4. Accuracy Issues

    Although the Sig P365 XL is known for its accuracy, some shooters may encounter accuracy issues. If you’re experiencing this problem, try the following troubleshooting steps:

    • Check your grip: Ensure that you are gripping the firearm properly and consistently. Inconsistent grip pressure can affect shot placement.
    • Check your sights: Verify that your sight is properly aligned and adjusted. Consider upgrading to high-quality aftermarket sights for improved accuracy.
    • Barrel fouling: Clean your barrel regularly to remove any fouling or debris that can affect accuracy.
    • Experiment with ammunition: Different ammunition brands and bullet weights can produce varying degrees of accuracy. Try different options to find the one that works best for your Sig P365 XL.

    5. Broken Firing Pin

    While it’s not a commonly found issue, some users have reported their unit was shipped with a broken firing pin. This is a quality control issue from Sig and they are actively taking care of it. If you are a victim of this issue, then you could try the following solution to help you.

    • Keep a spare: Fixing this problem on the fly is not possible at all. The best possible solution to this problem is to keep a spare pin on your hand. Just in case you happen to face the issue, you know immediately what to do.
    • Don’t buy used: Sig has reported this is a problem that only happens to older units. If you are planning to buy a Sig P365 XL, I recommend you stick to a newly manufactured batch not something from the used market.

    6. Other Considerations

    Aside from the specific problems mentioned above, there are a few general guidelines to keep in mind to ensure optimal performance with your Sig P365 XL:

    • Regular cleaning and maintenance: Keep your firearm clean and well-lubricated. Regularly inspect and clean all critical components to prevent issues from arising.
    • Use factory magazines: While aftermarket magazines may offer increased capacity, it’s recommended to use factory magazines specifically designed for the Sig P365 XL to ensure reliable feeding and function.
    • Follow proper ammunition guidelines: Always use ammunition that is within the recommended specifications outlined by Sig Sauer. Using improper ammunition can lead to various problems.
    • Seek professional help when needed: If you encounter persistent problems or are unsure about troubleshooting, consult a qualified gunsmith or Sig Sauer customer service for assistance.

    Frequently Asked Questions

    1. What are some common issues with the SIG P365 XL?

    Some common issues with the SIG P365 XL include failure to feed or eject, light primer strikes, and occasional slide lockback problems. These can often be resolved by cleaning and lubricating the firearm properly or by using high-quality ammunition.

    2. How can I troubleshoot failure-to-feed problems with the SIG P365 XL?

    If you experience failure to feed issues with your SIG P365 XL, ensure that the magazine is properly seated, clean the gun and magazine, and try using a different brand of ammunition. If the problem persists, contact SIG Sauer customer support for further assistance.

    3. Why am I experiencing light primer strikes with the SIG P365 XL?

    Light primer strikes can occur due to various reasons, including weak ammunition or a build-up of debris in the firing pin channel. Ensure that you are using ammunition from reputable manufacturers and regularly clean the gun to prevent these issues.

    4. How can I address occasional slide lockback problems with the SIG P365 XL?

    Occasional slide lockback problems can be frustrating but are often caused by the shooter inadvertently pressing the slide stop lever. To prevent this, ensure your hand placement allows for proper grip without interfering with the slide stop lever. Practicing proper grip techniques can help resolve this issue.

    5. Should I seek professional help for recurring problems with my SIG P365 XL?

    If you are experiencing recurring problems with your SIG P365 XL despite following proper maintenance and troubleshooting steps, it might be beneficial to seek assistance from a professional gunsmith or contact SIG Sauer customer support. They can provide further guidance and ensure your firearm functions properly.

    Final Thoughts

    In conclusion, the Sig P365 XL does have its fair share of problems. Despite its popularity and sleek design, users have reported issues such as failure to feed, magazine dropping, and inconsistent accuracy.

    While Sig Sauer has acknowledged some of these problems and made efforts to address them through updates and modifications, it’s clear that the P365 XL still has room for improvement. Potential buyers need to weigh the pros and cons before purchasing this firearm, taking into consideration its reported problems and the potential impact they may have on its performance and reliability.

    Remember to always prioritize safety and follow recommended maintenance procedures to enjoy a trouble-free shooting experience with your Sig P365 XL.

  • Do Tritium Sights Need To Be Charged?

    Do Tritium Sights Need To Be Charged?

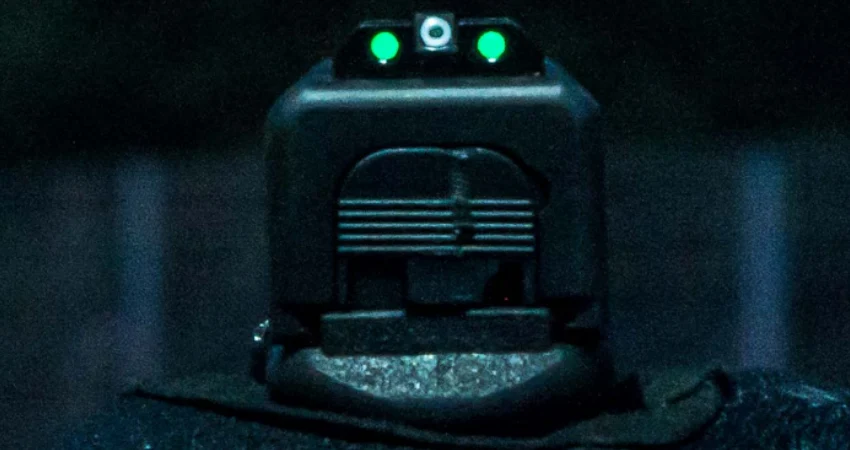
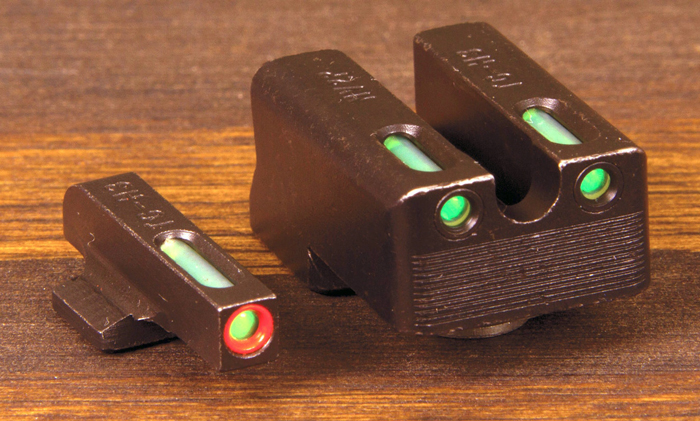
    To simply answer, no, the Tritium sights don’t need to be charged. It is because of the use of the material Tritium in the sights. The material is known to be a radioactive isotope which consists of three atoms of the element hydrogen.

    And in the optic, this Tritium comes in a small glass vial that contains Phosphor. So, what happens is, when the Tritium mixes with Phosphor, it radiates light. Even though it doesn’t emit a lot of light, it gives a glowing effect that can be seen in a dark environment.

    Installing Tritium Vials

    Hence, you don’t need any external power source to use the Tritium made night sights. This is one of the reasons for their popularity that you will never need to worry about recharging them and switching on/off the power while using them.

    How To Install Tritium Vials?

    You can always replace or re-install the Tritium vials in your rear sights. For the process, you will require the following tools:

    Now use the given steps to install Tritium vials in the rear sights:

    • The first thing you have to do is clean the sight’s place where you will insert the vials. To do that, use a good amount of Acetone to clean the area. Then using small screwdrivers or tweezers, you need to take out the old vials from the sights.
    • After taking out the vials, you may need to drill the sight holes a bit so that the new vials are set properly in the sights.
    • Now put the required amount of UV-activated adhesives into the holes.
    • Place the vials in the holes and make sure they are centered.
    • Within a week or so, the vials will be perfectly set in sight.

    Frequently Asked Questions

    Do Tritium sights need sunlight?

    No, the Tritium sights don’t need sunlight to function. The beta radiation that the Tritium emits, gets mixed with the Phosphor of the vial container. It mainly causes the sight to glow at night. But in the daytime, you won’t see the glow of the Tritium, it would rather look like a conventional dot in sight.

    Is Tritium dangerous?

    Having been exposed to a high level of tritium can be dangerous for you. But the Tritium night sights will not cause any harm to you. Because first, it is properly sealed in the sight, so there is very little chance of it being cracked or broken. Next, the amount of beta particles that the company uses is quite low.

    What is the drawback of Tritium sights?

    The main drawback of the Tritium sights is, they cost a lot more than the other optics. Since Tritium is an expensive material, it naturally increases the price of the sights. However, interestingly, the money you put into the sights is a fruitful investment.

    The half life of the Tritium sights is nearly 12 years which means you can continuously use the sights for 12 years without any hassles. And after that time frame, they can work an additional 5-6 years.

    Conclusion

    To conclude, you don’t need to recharge the Tritium made night sights. This self-luminous sight allows you to use it without any external power source or backup. Many of you may think that since it is a radioactive material, it may be harmful to your health.

    But that is not the case. The level of beta radiation used in the sights is very low and hence, it won’t cause harm to your health. Therefore, you can purchase the Tritium sights without worrying about anything. Plus, if you ever need to replace the vials, you can easily do it by yourself. For that, you can use our given installment procedure if you want.

  • Mossberg Patriot Problems [& How To Fix Them!]

    Mossberg Patriot Problems [& How To Fix Them!]

    Doesn’t it feel bad when your new weapon starts to malfunction all of a sudden? All of a sudden, you start to face problems that you never knew of before. It’s an annoying experience, to say the least.

    As a firearm owner, I’m sure you have had your fair share of troubleshooting. But if you are a new buyer and looking to purchase the Mossberg Patriot, I’m sure you have some questions about it. After all, you wouldn’t want to purchase a new gun and face countless issues.

    While the Patriot isn’t bombarded with jamming and misfiring issues, it does have some common issues that are quite easy to troubleshoot. Regardless, you should know of them. Let’s find out the problems with Mossberg Patriot and look into the solutions as well.

    Mossberg Patriot

    Mossberg is a well-known name in the firearms industry, renowned for producing reliable and durable firearms for various applications. Among their popular offerings is the Mossberg Patriot, a bolt-action rifle designed for hunters and shooters alike.

    While the Mossberg Patriot has gained a positive reputation for its affordability and accuracy, like any other product, it is not without its fair share of problems. If you own a Mossberg Patriot or are considering purchasing one, read on to ensure you are well-informed.

    Problem 1: Feeding and Extraction Issues

    One of the most frequently reported problems with Mossberg Patriot rifles is related to feeding and extraction. Some users have experienced difficulties with the rifle failing to feed rounds properly, resulting in feeding failures or misfires.

    Additionally, extraction problems have been reported, where spent casings get stuck or fail to eject consistently.

    To address these issues, consider the following solutions:

    • Ensure you are using the correct ammunition for your rifle. Different calibers require specific ammunition, so make sure you are using the appropriate type.
    • Inspect the magazine for any visible damage, debris, or rust. Clean or replace the magazine if necessary, as a damaged or dirty magazine can hinder proper feeding.
    • Thoroughly clean the chamber and bolt assembly to remove any dirt, debris, or excess lubrication that may be affecting smooth feeding and extraction. Pay extra attention to the area around the extractor and ejector.
    • Check the extractor claw for proper function. Ensure it is not damaged or excessively worn, as this can cause extraction problems. If needed, replace the extractor.
    • If the feeding and extraction issues persist, it is recommended to contact Mossberg customer support or a qualified gunsmith for further assistance.

    Problem 2: Trigger Quality and Malfunctions

    Another area where Mossberg Patriot owners have experienced problems is with the trigger. Some users have reported heavy and gritty triggers that negatively impact accuracy and overall shooting experience. In some cases, triggers have malfunctioned or failed to reset properly.

    Here are some possible solutions for trigger-related problems:

    • Perform a thorough cleaning of the trigger assembly, including the sear and trigger components. Sometimes, dirt or debris can affect the trigger’s smooth operation.
    • Consider installing an aftermarket trigger upgrade kit. There are several reputable manufacturers that offer replacement triggers for the Mossberg Patriot, which can significantly enhance the trigger pull and overall shooting experience.
    • In cases of trigger malfunctions or failures, it is advisable to contact Mossberg customer support or a qualified gunsmith for diagnosis and repair. Attempting to fix complex trigger problems on your own can lead to further damage or safety hazards.

    Problem 3: Stock and Recoil related issues

    While not as prevalent as feeding or trigger problems, Mossberg Patriot users have occasionally reported issues related to the stock and recoil management. These issues can affect shooter comfort, accuracy, and overall performance.

    Consider the following solutions to address stock and recoil-related problems:

    • Check the stock for proper fit and alignment. Ensure it is securely attached to the action and barrel, with no visible cracks or damage. A loose or damaged stock can negatively impact accuracy and contribute to increased felt recoil.
    • If you find the stock uncomfortable or unsuitable for your shooting style, consider investing in an aftermarket stock or recoil pad. These accessories can provide additional ergonomics and recoil management, enhancing your shooting experience.
    • Apply proper shooting techniques, including a solid and consistent shooting stance, to help manage recoil. Practice proper breathing and trigger control as well.
    • For serious stock or recoil-related problems, it is advisable to contact Mossberg customer support or a qualified gunsmith for further assistance.

    Problem 4: Accuracy and Sight Alignment

    Accuracy is paramount for any rifle, and while the Mossberg Patriot is generally known for being accurate, some users have reported issues with achieving consistent and satisfactory accuracy. Sight alignment problems have also been mentioned.

    Here are some solutions to improve accuracy and sight alignment:

    • Clean the barrel thoroughly to remove any fouling or debris that may affect accuracy. Use proper cleaning tools and techniques for the Mossberg Patriot.
    • Ensure the scope or optic is securely mounted and properly aligned with the bore. Loose or misaligned scopes can significantly impact accuracy. Consider using a torque wrench to tighten scope mounts to the manufacturer’s specifications.
    • If you encounter persistent accuracy problems, it may be beneficial to experiment with different types or brands of ammunition. Some rifles perform better with specific ammunition loads, so finding the right combination can enhance accuracy.
    • To address sight alignment issues, consult the rifle’s manual for proper adjustment procedures or seek assistance from a qualified gunsmith or an experienced shooter who is familiar with the Mossberg Patriot.

    Problem 5: Lack of Accessories and Customization Options

    Although not directly a functional problem, some Mossberg Patriot users have expressed dissatisfaction with the limited availability of aftermarket accessories and customization options compared to other rifle models.

    While the selection may not be as extensive as with certain other firearms, there are still some options to explore:

    • Check with reputable firearms accessory manufacturers for available options. Some companies produce aftermarket stocks, magazines, triggers, and other accessories specifically designed for the Mossberg Patriot.
    • Consider exploring custom gunsmithing options, where experienced gunsmiths can modify or alter certain aspects of the rifle based on your preferences and requirements.
    • Engage with online forums or communities dedicated to the Mossberg Patriot, where owners share their experiences and modifications they have made to enhance their rifles.
    • Remember that any customization or modification should be performed with caution and in compliance with local laws and regulations. Always prioritize safety and consult professionals when necessary.

    Some Extra Tips

    While the Mossberg Patriot may have its fair share of problems, it is essential to note that these issues can vary from rifle to rifle. Many owners have reported positive experiences and excellent performance from their Mossberg Patriot rifles.

    By following proper maintenance, inspecting your rifle regularly, and addressing any problems promptly, you can make the most of your Mossberg Patriot and enjoy its many merits.

    Frequently Asked Questions

    1. Why does my Mossberg Patriot have feeding issues?

    The most common cause of feeding issues in Mossberg Patriot rifles is a dirty or improperly lubricated magazine. Ensure the magazine is clean and properly oiled. Also, check for any debris or obstructions in the chamber or feed ramp.

    2. What can I do if my Mossberg Patriot has accuracy problems?

    If your Mossberg Patriot is experiencing accuracy problems, first check the barrel for any obstructions and ensure it is clean. Additionally, ensure that the scope or sights are properly mounted and zeroed. Experimenting with different types of ammunition can also help improve accuracy.

    3. How can I fix a Mossberg Patriot with extraction problems?

    Extraction problems in Mossberg Patriot rifles can often be resolved by cleaning and lubricating the bolt assembly. Ensure that the extractor is clean and free from any debris. Additionally, check the chamber for any residue or obstructions that may hinder extraction.

    4. What are some common causes of trigger issues in the Mossberg Patriot?

    Common causes of trigger issues in the Mossberg Patriot include improper adjustment and debris or dirt in the trigger assembly. Ensure that the trigger is properly adjusted according to the manufacturer’s instructions and clean the trigger assembly regularly to maintain smooth operation.

    5. My Mossberg Patriot has a jamming issue, how can I fix it?

    If your Mossberg Patriot is experiencing jamming issues, check the ammunition you are using to ensure it is of the correct caliber and is in good condition. Clean and properly lubricate the rifle, paying close attention to the chamber and feed ramp. If the problem persists, consult a professional gunsmith.

    Final Thoughts

    In conclusion, the Mossberg Patriot does have its fair share of problems. Issues such as accuracy inconsistencies, stiff bolt actions, and low-quality triggers have been reported by users. While Mossberg is well-known for producing reliable firearms, it seems that the Patriot model has room for improvement.

    As a potential buyer, you should be aware of these problems and consider them before making a purchase decision. However, it’s worth mentioning that not everyone has experienced issues like these, as majority have reported satisfactory performance.

    Ultimately, it would be wise to thoroughly research and test the Mossberg Patriot before investing in this rifle to ensure it meets your specific needs and preferences.

  • How To Dispose of Shotgun Shells?

    How To Dispose of Shotgun Shells?

    If you are a shotgun owner and use your gun very often, your shotgun shell collection has grown a lot. With the growing concern of the environment, it’s necessary to dispose of shotgun shells safely.

    Without harming yourself or nature in the process, let’s find out some easy ways to dispose of shotgun shells. As it’s your responsibility to clean after yourselves, it’s super important to dispose of shotgun shells the right way. Don’t worry, it’s not rocket science.

    Let’s find out the solution to this growing problem together.

    What Are Shotgun Shells Made of?

    Before we know the process of disposing of them, it’s necessary to know what you are working with. I’m sure this question has spun in your head at least once. Most modern shotgun shells are made out of plastic components, gunpowder inside, brass plating, and primer.

    The amount of brass found in the shell will depend on the shell type. So, in short, you will mostly be left with a little bit of brass and lots of plastic waste.

    How To Dispose of Shotgun Shells?

    Here are a couple of ways that you can follow in terms of disposing of the shells.

    Recycle The Shells

    The best way to not waste the shells is to recycle them. A lot of recycling centers will accept shotgun shells as long as they are made out of metal. But a lot of them will not accept them due to the risk of having explosive gunpowder left in them. So, make sure to talk with your local center first before you take them in for recycling. As for the plastic ones, the same rule applies. Most of them will accept plastic ones.

    Dispose of Them in A Metal Container

    If your local area has no recycling center and you don’t have access to one in the nearest city either, then it’s best to dispose of them in a metal container. Put all of your shells in a metal container and then throw them in a dumpster or in a landfill.

    Before you throw them out, make sure that the metal container is tightly sealed and it’s not explosive either. You don’t want your shells to run around freely in the landfill.

    Use Them For Craft

    Sounds ridiculous, but it’s something to think about. Shotgun shells can be used for a variety of little crafts. From jewelry to picture frames, the limit is your imagination and the method of crafting.

    Shoot The Old Shells

    Now this method is something that I don’t recommend to everyone. I just threw it in for fun. And that’s exactly what this method is. If you are somewhat of a gun enthusiast and possess a lot of different weapons.

    It’s a good idea to practice those weapons while using your old shells as targets. Now, I don’t recommend this because it creates more waste. But if you do it in a contained area, then you can easily control the waste happening and then later throw it in a garbage bin inside a metal container.

    Give Them Away

    I’m sure you are in contact with your local gun agency/firms. You would be surprised, but a lot of them accept old shotgun shells and they recycle them through their connections.

    Are Shotgun Shells Recyclable?

    It depends on the type of shell. For the most part, it’s recyclable. If you possess just the brass casing or the plastic shell, both of them are recyclable. While you, yourself might not be able to DIY recycle them, a recycling center that has the machinery needed for the job can easily do it on your behalf.

    How To Recycle Shotgun Shells?

    You cannot do that yourself. It’s better to leave this to the professional. What you can do is give your contribution to the process. You can leave the shotgun shells at your garbage bin and they will find ways to deal with it.

    Also, you can participate in waste collection events. Very often, there are waste-collecting events going on that specialize in metal and plastic collection. Depending on what kind of shells you have, you might want to take part in them and give them away your entire shell collection. Whether it’s full of plastic or full of brass, both of them will get recycled into usable materials again.

    What Not To Do While Disposing of Shotgun Shells?

    There are a couple of things that you should keep in mind while disposing of shotgun shells.

    Don’t Throw Them in The Trash Bin

    Throwing away your ammo in the garbage bin won’t solve the problems. They can still be hazardous when they are going through the burner at garbage disposal. It’s better to dispose of them the right way.

    Don’t Soak Them

    Doesn’t matter if it’s oil or water. Don’t soak your shells in anything. Some people often put shotgun shells in water or oil to replace the remaining gunpowder inside the shells. Don’t be like them. It’s hazardous and makes it nearly impossible for the shell to be recycled.

    Burying Is Not The Solution

    They are not biodegradable. If you leave them for a thousand years, they will remain the same. Maybe a bit cracked or deflated, but they won’t degrade into the earth and mix with it. So, don’t be a fool enough to bury them.

    Can You Throw Away Shotgun Shells?

    No, you cannot. There are proper ways to dispose of them as I mentioned. And if you are unable to follow any of the steps I mentioned thus far, it’s better for you to reach out to the right people.

    Reach out to your local gun range owners or friends who are in the shooting life longer than you. For sure, they can direct you to the place where you can easily recycle or dispose of your shotgun shells.

    Conclusion

    I hope you don’t waste your shells anymore and repurpose them the right way. Sure, it seems like a hassle at first and you might not want to do all the steps I mentioned thus far. But I assure you, it’s your duty to do such. If you use a shotgun, you are obliged to take care of the waste generated by it.

    That’s all for now. I hope you learned something new and useful. Till we meet again, take care and have fun. Remember, keeping the world clean is our duty.

  • Atn Thor 4 Problems [& How To Fix Them!]

    Atn Thor 4 Problems [& How To Fix Them!]

    Hunting during the night is lots of fun. Once you get a taste of the adventure, it’s hard to go back from it. To make hunting and shooting viable during the night, lots of companies have made thermal vision-capable optics. One such brand is ATN.

    Their Thor series is known for reliable performance and excellent image processing. While the Thor 4 is an amazing optic, to say the least, it’s not without its issues. Some may be major and some are barely an inconvenience. Still, as a potential buyer, you should know what you are getting into.

    If you are planning to buy the Thor 4 or are an owner of the scope currently and facing some problems, let me help you with the potential troubleshooting.

    ATN Thor 4 Problems: Solutions to Common Issues

    The ATN Thor 4 is a popular thermal scope that has gained significant attention from hunters, outdoor enthusiasts, and tactical shooters. With its advanced features and cutting-edge technology, the Thor 4 offers a range of benefits.

    However, like any electronic optics, it is not immune to problems or issues that users may encounter. That’s why, I’m trying to figure out all the known issues with Thor 4 and help you guys with your decision-making.

    1. Battery Life

    One of the most frequently reported concerns among ATN Thor 4 users is the battery life. The thermal scope relies on a built-in rechargeable battery to power its functions.

    If you find that the battery drains too quickly, there are some steps you can take to improve its performance:

    • Ensure that the scope is turned off when not in use. Leaving it in standby mode can still consume power.
    • Dim the brightness level of the screen. Higher brightness settings require more power.
    • Consider carrying spare batteries or a portable charger when planning extended outings.

    2. Image Quality

    While the ATN Thor 4 delivers exceptional image quality, some users have reported experiencing issues with clarity and sharpness.

    If you find that the image quality is not up to your expectations, try the following troubleshooting steps:

    • Check if the lens is clean. Use a microfiber cloth to gently wipe away any dust or smudges.
    • Adjust the focus ring on the scope, ensuring that the image is as sharp as possible.
    • Experiment with different color palettes and contrast settings to find the one that suits your preferences and conditions.
    • If the problem persists, contact ATN customer support for further assistance.

    3. GPS and Navigation Issues

    The ATN Thor 4 features integrated GPS and navigation capabilities, which can greatly enhance outdoor adventures.

    Some users have encountered difficulties with these features. If you are experiencing problems with GPS or navigation, try the following solutions:

    • Ensure that the GPS is enabled in the settings menu of the scope.
    • Allow the device sufficient time to establish a GPS connection. This process may take a few minutes.
    • Update the firmware of the ATN Thor 4 to the latest version, as this can often resolve software-related issues.
    • Ensure a clear line of sight to the sky to improve GPS signal reception.

    4. Firmware Updates

    ATN frequently releases firmware updates to enhance functionality and address any potential bugs or issues.

    To keep your ATN Thor 4 in optimal condition, it is important to regularly update its firmware. Here are the steps to update the firmware:

    • Connect your ATN Thor 4 to your computer using a USB cable.
    • Visit ATN’s official website and navigate to the support section.
    • Download the latest firmware update for the Thor 4 model.
    • Once downloaded, follow the provided instructions to install the firmware on your device.

    5. Mounting and Zeroing

    Properly mounting and zeroing your ATN Thor 4 on your firearm is crucial for accurate shooting. Some users may encounter difficulties with these processes.

    Follow these steps to ensure proper mounting and zeroing:

    • Choose a high-quality mounting system that securely attaches the scope to your firearm.
    • Follow the manufacturer’s instructions for mounting the scope, ensuring proper alignment and torque settings.
    • Perform the necessary adjustments for zeroing the scope, such as windage and elevation corrections.
    • Use a reliable laser bore sighter to aid in the zeroing process, ensuring precision and efficiency.

    Keep In Mind

    The ATN Thor 4 is an impressive thermal scope that offers a range of advanced features. While the Thor 4 may encounter some problems from time to time, being prepared and armed with troubleshooting solutions can help you overcome these challenges.

    By addressing common issues like battery life, image quality, GPS and navigation problems, firmware updates, and mounting and zeroing, you can make the most of your ATN Thor 4 and enjoy optimal performance during your outdoor adventures.

    Remember, if all else fails, don’t hesitate to reach out to ATN’s customer support for further assistance.

    Frequently Asked Questions

    Why is my ATN Thor 4 scope not turning on?

    Ensure that the battery is fully charged, and check the power button for any damage or debris that may be affecting its functionality. If the issue persists, contact ATN customer support for further assistance.

    What should I do if my ATN Thor 4 is not connecting to Wi-Fi?

    Make sure that you are within range of a Wi-Fi network and that the network is functioning properly. Restart the device and try connecting again. If the problem continues, consult the user manual or contact ATN support.

    How can I resolve the image quality issues on my ATN Thor 4?

    Clean the lenses and make sure they are not obstructed or damaged. Adjust the focus and ensure that the brightness settings are suitable for the current lighting conditions. If the problem persists, contact ATN for further assistance.

    Why does my ATN Thor 4 experience freeze or lag during use?

    Check if the battery is sufficiently charged, as low power can cause performance issues. Ensure that the device firmware is up to date and consider clearing any unnecessary applications running in the background. If the problem persists, contact ATN support.

    What should I do if my ATN Thor 4 is not recording videos?

    Verify that the SD card is properly inserted and functioning correctly. Check the available storage space and format the SD card if needed. If the issue persists, contact ATN customer support for troubleshooting steps.

    Final Thoughts

    In conclusion, the ATN Thor 4 device has faced its fair share of problems. The issues surrounding its performance, such as battery life and image quality, have been major concerns for users.

    Additionally, the high price tag and lack of customer support have also posed significant obstacles.

    The problems associated with this device have hindered its overall functionality and user experience. As potential buyers consider investing in thermal imaging devices, it is crucial to be aware of the ATN Thor 4 problems to make an informed decision.

  • How To Install A Muzzle Brake?

    How To Install A Muzzle Brake?

    Muzzle brakes are a wonderful thing. They were created first to reduce the kickback of anti-tank weapons. Slowly from there, it was adapted in a smaller format and made for rifles, SMG, shotguns, and pistols.

    While plenty of rifles come with some sort of muzzle attachment, most people will ditch that for a muzzle brake. Like many other modifications, this one requires a bit of skill and patience as well.

    But changing the muzzle brake is one of the easiest mods you are about to do. Unless you plan to pin and weld a muzzle brake, then you won’t have to take this to a gunsmith at all.

    Without further ado, let me help you with the muzzle brake installation.

    What are the benefits of a muzzle brake?

    “Why would I want to install a muzzle brake? My gun has a flash hider already”. This question is asked more often than you can imagine. After all, a lot of rifles come with flash hiders.

    The point of a muzzle brake is to mitigate the muzzle rise of your gun and reduce the recoil of your weapon. By releasing the high-propellant gas before it reaches the end of the barrel, it reduces the muzzle rise by a lot.

    Making your aim more accurate and easier to transfer target while shooting. So, the moral is, the muzzle brake reduces recoil and it makes it easier to aim with the gun. That’s why you should buy a muzzle brake and pair it with any weapon you are using. Of course, you need to buy the brakes that work with your weapon for it to work.

    Do I need tools to install a muzzle brake?

    You do need some tools to install the brake. But those are so basic, that any hunters/shooters should already have them in their garage. They are quite often used in other DIY crafts and daily necessities.

    Let’s install the muzzle brake now

    Now that we know about the required tools and why you should install a muzzle brake, let’s learn how to install it on a weapon.

    Unload the gun and vise it

    Make sure to unload all the bullets from the gun before you start the process. It’s super important as we don’t want any accidents to happen. Then safely place it on the vise and tightly lock it in place. Don’t over-tighten the vise as you risk bending or at worse, breaking some portion of the weapon.

    Use masking tape

    A couple of layers of masking tape on the barrel and the wrench itself will prevent any accidental scratches. Don’t worry, masking tapes aren’t slippery. They won’t make you mistakenly slip from the barrel or the nut.

    Take out the old device

    Chances are, your weapon might have some sort of previous muzzle attachments. If that’s true, then you need to unscrew the previous barrel attachment first. If it didn’t have any attachments, then you will need to unscrew the thread protector. The thread protector safe keeps the threading of the barrel.

    Clean the threads and the barrel itself

    Make sure to clean the barrel threads completely. Don’t leave a single speck of dirt or grease on the barrel. As they will interfere with the installation of the new muzzle brake. Use IPA if needed. But make sure to keep it 100% clean.

    Attach the muzzle brake

    Now that you cleaned the barrel threads completely there is no residue or oil left. Place the muzzle brake on the barrel thread and slowly tighten it with your fingers. Once you feel like you cannot tighten it more with your fingers, time to pull out the big guns.

    Wrenching time

    Use the masked wrench to slowly tighten the muzzle brake to the point where you see some resistance. Make sure to not overdo the tightening. If you over-tighten it, you risk breaking some of the threads in the barrel. If you end up doing that, gunsmithing is required. At worst, you might need to replace the entire barrel and that will cost you a ton of money.

    Try out the new mods

    After installing the muzzle brake, it’s time for you to take the gun for a test drive. Shoot a couple of mags and get a feel of the new recoil and muzzle rise height. As they will be lower than before, it will take some time for you to get used to it. But once you do, it’s over for your competition.

    Frequently Asked Questions

    How to install a muzzle brake with a jam nut?

    Some shooters prefer to use a jam nut over a crush washer to install their muzzle brake. In this process, you need to place the jam nut on the thread before you put in the muzzle brake. Then follow the process mentioned above.

    Can you install a muzzle brake yourself?

    Absolutely! Installing a muzzle brake doesn’t require gunsmithing. Unless you need to install it on a barrel that has no threading and you need to pin it, then you will require a gunsmith. Because everyone doesn’t have welding machines at their disposal. But everyone can manage a wrench! So, yes, you can install a muzzle brake by yourself.

    Do I need to use Loctite when installing a muzzle brake?

    No, you don’t need to. Loctite isn’t necessary or recommended. If your muzzle brake isn’t installed naturally, then you have a problem on the barrel or the brake itself. So, make sure to identify the problem before installing it with Loctite. You might need to break the barrel if you ever want to change the attachment.

    Does installing a muzzle brake cause problems?

    No, it won’t cause any kind of problems. It won’t make you fire or miss targets. Muzzle brakes don’t affect accuracy or velocity either. Make sure to install a muzzle brake on your weapon if you ever thought of competing or hunting regularly.

    Conclusion

    And there you have it. A guide that someone never used a weapon can follow along as well. I’m well aware there are countless other guides like this available, but I wanted to do it a bit differently. While educating you about the brake itself and helping you get better at DIY weapon modding.

    Skills like this will come in handy if you want to stay in the game for a long time. After all, we cannot bother to spend tons of money every so often on gunsmithing when we can do it ourselves. But if you are still not confident enough to install a muzzle brake by yourself, then I suggest you visit your local gunsmith. It doesn’t cost much to get it installed on your weapon.

    With that said, that’s all for now. I hope you learned something new today and use it wisely. Till we meet again. Take care and stay out of trouble.

    Muzzle Brakes:- 300 Win Mag | 308 Bolt Action | 350 Legend | 450 Bushmaster | 458 Socom | 50 Beowulf | 5/8-24 | 6.5 Creedmoor | 6.5 Grendel | 9mm | AK-47 | Mosin Nagant